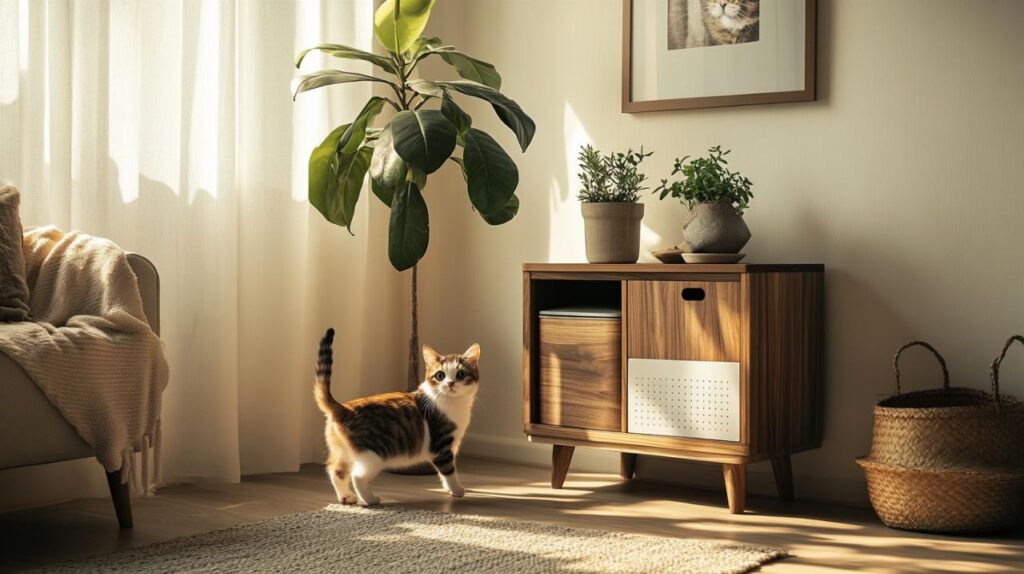
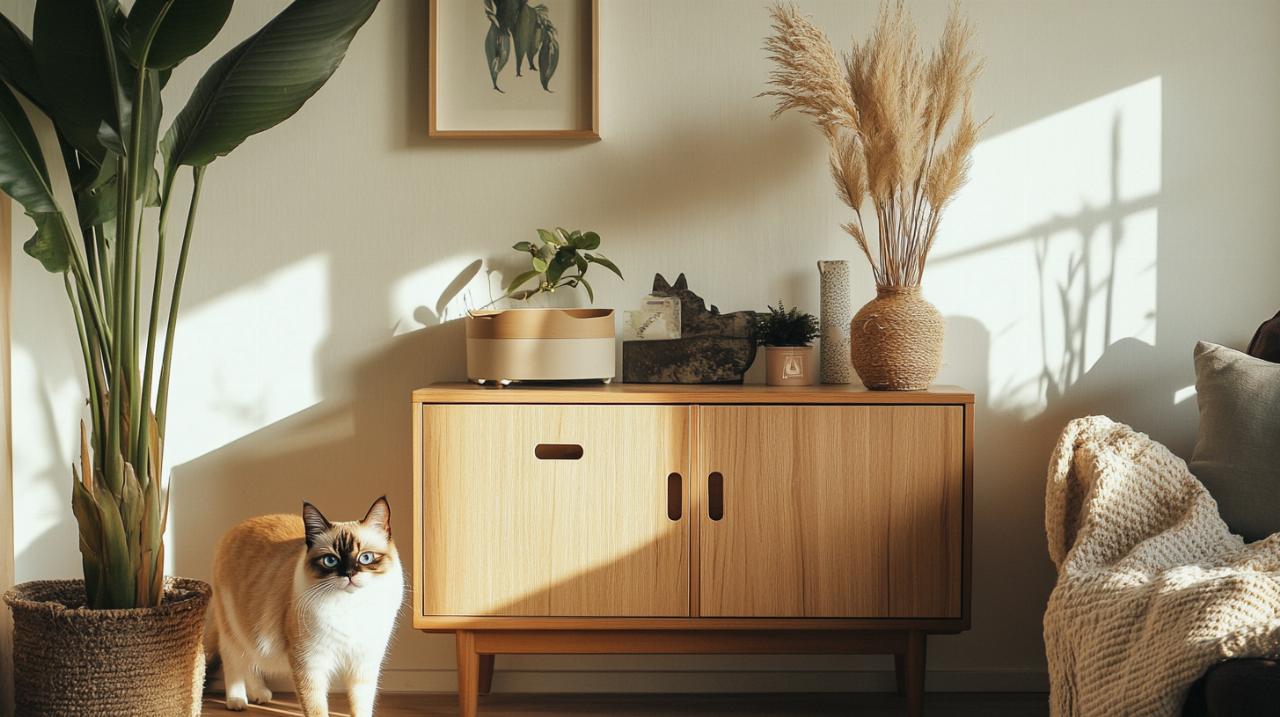
Transforming your home into a harmonious space for both you and your feline companion often requires a touch of creativity, especially when it comes to managing the less glamorous aspects of cat ownership. A litter tray, whilst essential, hardly contributes to the aesthetic appeal of your interior. Fortunately, crafting bespoke pet furniture to discreetly conceal this necessity is an achievable and rewarding project that combines practical woodworking skills with thoughtful design. This guide will walk you through the process of creating a custom cabinet that not only hides the litter box but also complements your existing décor, ensuring comfort for your cat and visual harmony for your home.
Planning your discreet feline lavatory cabinet
Before you pick up a saw or jigsaw, careful planning is paramount. The success of your handmade cat furniture hinges on understanding the space you have available and the dimensions required for your cat's comfort. Begin by measuring the area where you intend to place the finished piece. Consider whether it will sit in a bathroom, hallway, or even a corner of your garden room. The location will influence not only the size but also the style and finish you ultimately choose. Take into account the height requirements that allow your cat easy access whilst providing enough internal space for the litter tray itself, along with room for your pet to move around comfortably. A well-designed cat litter cupboard should feel spacious for the animal whilst remaining compact enough to fit seamlessly into your home.
Measuring Up: Determining the Perfect Dimensions for Your Space
Accurate measurements form the foundation of any successful build. Start by noting the length, width, and height of the area designated for your creation. If you are placing the unit against a wall, ensure you account for skirting boards or any other architectural features that might affect the fit. Next, measure your existing litter box to determine the minimum internal dimensions your cabinet must accommodate. It is wise to add a few centimetres on each side to allow for easy cleaning and to ensure your cat can enter and exit without difficulty. Cats appreciate privacy and vertical observation points, so consider a design that offers enough height for the cat to feel secure. Sketching a rough diagram of your intended piece can help visualise how the finished article will sit within your room and how it will integrate with other elements such as a bookshelf or feeding station.
Selecting Quality Materials and Essential Tools for the Job
Choosing the right materials is crucial for both durability and aesthetic appeal. Opt for quality wood panels that can withstand regular use and are easy to work with using standard tools. Plywood or medium-density fibreboard are popular choices for beginners due to their affordability and ease of cutting, whilst natural oak finishes offer a more refined look if you are aiming for a piece that truly complements high-end interiors. Gather your essential tools before you begin. A jigsaw will prove invaluable for cutting curved access points or decorative details, whilst a reliable saw is necessary for straight cuts. You will also need a drill, screws, wood glue, sandpaper, and a tape measure. If you plan to paint your creation, select colours that match your existing décor. Paint colour options are vast, so consider samples to ensure the final finish blends seamlessly into your bathroom or living space. For those who prefer a natural aesthetic, a clear varnish or oil can enhance the grain of the wood whilst providing protection.
Step-by-step construction: building your litter box enclosure
With your materials assembled and your plan finalised, it is time to begin the construction phase. This stage requires patience and precision, but the reward is a functional and attractive piece of integrated pet furniture. Start by cutting all the wood panels to the dimensions you have determined. Take your time with each cut to ensure accuracy, as even minor discrepancies can affect the stability and appearance of the finished cabinet. Once all panels are cut, lay them out to confirm they fit together as intended before proceeding to assembly. This dry run can save considerable time and frustration later on.
Cutting Wood Panels with Precision Using Your Jigsaw and Saw
Begin by marking your cutting lines clearly on each panel using a pencil and a straight edge. For straight cuts, a traditional saw or circular saw is ideal, whilst a jigsaw excels at creating curved or intricate shapes, such as the entry point for your cat. When using a jigsaw, ensure the blade is sharp and appropriate for the thickness of your material. Work slowly and steadily, allowing the tool to do the work rather than forcing it through the wood. Safety is paramount, so wear protective eyewear and keep your hands well clear of the blade. After cutting, smooth all edges with sandpaper to remove splinters and create a professional finish. This step is particularly important for areas your cat will come into contact with, as rough edges can cause injury or discomfort.
Assembling the Framework: Joining Techniques for a Sturdy Interior Structure
Once all panels are cut and sanded, you can begin assembling the framework. Start by constructing the base and sides, using wood glue and screws to create strong joints. Pre-drilling screw holes will prevent the wood from splitting and ensure a neater finish. For added stability, consider using corner braces or reinforcing blocks on the inside of the cabinet. As you build, regularly check that corners are square using a carpenter's square, as this will ensure the doors or access panels fit correctly later. If your design includes shelves or a bookshelf integration, install these supports at this stage, ensuring they are level and securely fastened. A double piece that accommodates both cats and dogs might require separate compartments, so plan the internal layout carefully to maximise functionality whilst maintaining structural integrity.
Finishing touches: making your diy creation blend seamlessly into your home
With the structure complete, attention turns to the finishing touches that will transform your build from a simple box into a piece of custom pet furniture that enhances your interior. The goal is to create a piece that not only serves a practical purpose but also contributes to the overall aesthetic of your home. This phase allows for creativity and personalisation, whether you opt for bold paint colours or natural oak finishes that highlight the beauty of the wood grain.
Camouflage Ideas: Painting and Styling to Match Your Bathroom or Garden Aesthetic
Painting your creation offers an opportunity to either camouflage it within your existing décor or make it a statement piece. If the cabinet will reside in a bathroom, consider colours that complement your tiles, fixtures, or towels. Soft neutrals, whites, or greys are timeless choices that blend effortlessly, whilst bolder hues can add a playful touch. Before painting, apply a primer to ensure even coverage and better adhesion of the topcoat. Multiple thin layers are preferable to one thick coat, as this reduces the risk of drips and provides a smoother finish. For a natural look, a clear varnish or oil will protect the wood whilst showcasing its texture. If the piece is destined for a garden room or conservatory, consider a weather-resistant finish to protect against humidity and temperature fluctuations. Adding decorative elements such as stencilled patterns, knobs, or trim can elevate the design and make it uniquely yours.
Practical Additions: Ventilation and Access Points for Easy Maintenance
Functionality should never be sacrificed for aesthetics. Adequate ventilation is essential to prevent odours from accumulating inside the cabinet. Drill several small holes in the back or sides of the unit, or incorporate a decorative lattice panel that allows air to circulate freely. Position these vents discreetly so they do not detract from the overall appearance. Easy access for cleaning is another critical consideration. A hinged door or removable panel will allow you to reach inside to change the litter and clean the tray without difficulty. Magnetic catches or simple latches can keep doors securely closed whilst remaining easy to open. If your design includes feeding stations for cats or dogs, ensure these are at a comfortable height and can be accessed without disturbing the litter area. Thoughtful details such as a removable tray or a washable liner can further simplify maintenance and prolong the life of your handmade creation. By focusing on both form and function, you will create a tailored pet solution that meets your cat's privacy needs whilst contributing to a harmonious and stylish living environment.