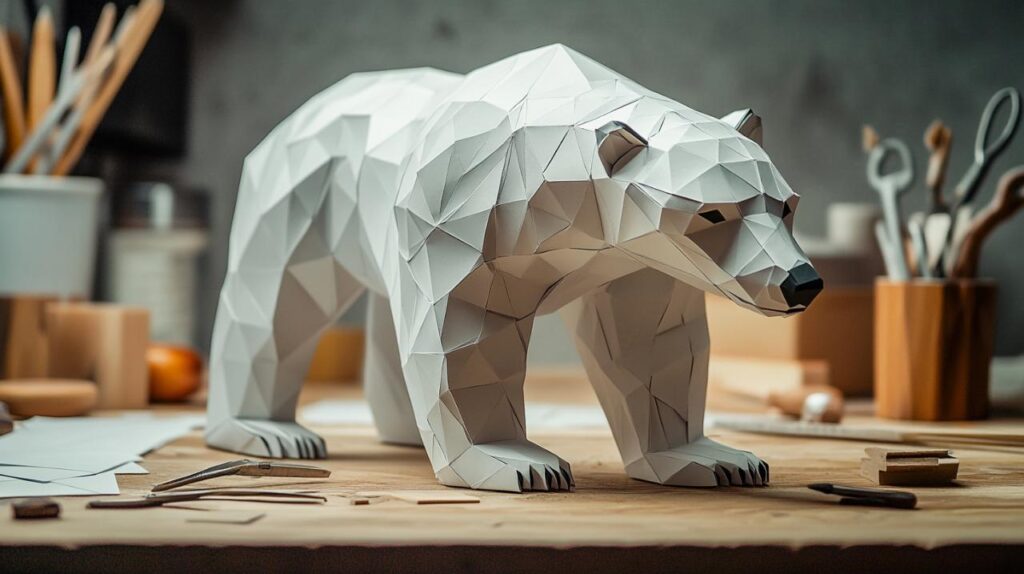
Creating a three-dimensional polar bear from paper is a rewarding and meditative craft that transforms a flat template into a striking piece of geometric art. This captivating project combines the precision of origami with the accessibility of a printable template, offering enthusiasts a chance to bring an Arctic animal sculpture into their home without the need for advanced skills or expensive materials. With our comprehensive PDF format guide, you will discover how each fold and connection contributes to a low poly design that captures the majestic essence of the polar bear while adding a touch of handmade elegance to your living space.
Getting started with your polar bear 3d papercraft project
Before diving into the assembly process, it is essential to gather everything you need and familiarise yourself with the template. A successful papercraft begins with preparation, and understanding the structure of your DIY kit will save time and ensure a smooth crafting experience. The beauty of this project lies in its simplicity, yet achieving professional results requires attention to detail from the outset.
Essential Materials and Tools You'll Need for Your Origami Model
To embark on this creative journey, you will require a few basic materials that are likely already in your home or easily sourced from local suppliers. The foundation of your polar bear paper model is a high-quality printable template, which you can download in PDF format and print on sturdy card stock or thick paper. Standard printer paper may be too flimsy, so opting for paper with a weight of at least one hundred and sixty grams per square metre will provide the necessary rigidity for your sculpture. In addition to the printed sheets, a sharp craft knife or a pair of precision scissors will be indispensable for cutting along the template lines. A metal ruler helps achieve clean, straight edges, while a scoring tool or a spent ballpoint pen can create crisp fold lines that enhance the overall appearance of your geometric art. A reliable adhesive is equally important, and a glue stick or white craft glue works well for most paper crafts, though double-sided tape can offer a quicker alternative. Finally, a cutting mat protects your work surface and prolongs the life of your blades, making it a worthwhile addition to your crafting supplies.
Understanding the pdf template before you begin crafting
Once you have printed your template, take a moment to examine the layout and markings before making any cuts. The PDF format ensures that all elements are scaled correctly, and each piece is clearly labelled to guide you through the assembly process. Most templates include numbered or lettered tabs that indicate where to apply glue and which edges should be joined together. Familiarising yourself with these indicators will prevent mistakes and reduce the likelihood of having to backtrack during construction. Some designs may also feature dotted or dashed lines to denote fold directions, with mountain folds pushing outward and valley folds pulling inward. Understanding these conventions is crucial for achieving the low poly design that defines the aesthetic of your Arctic animal sculpture. Spend a few minutes reviewing the instruction sheet that accompanies the template, as it often contains tips specific to the model and highlights areas that require extra care. This initial investment of time will pay dividends as you progress through the project, ensuring that each section of your polar bear takes shape exactly as intended.
Step-by-step assembly guide for your diy polar bear model
With your materials prepared and your template understood, you are ready to begin constructing your paper model. The assembly process can be broken down into two main stages: cutting and scoring, followed by folding and gluing. Each stage demands patience and precision, but the satisfaction of watching your polar bear emerge from flat sheets is well worth the effort.
Cutting and Scoring Techniques for Professional-Looking Results
Begin by carefully cutting out each piece along the solid lines marked on your printable template. Use smooth, confident strokes with your craft knife or scissors, and take your time to ensure accuracy. Rushing through this stage can lead to ragged edges that detract from the finished appearance of your craft kit. If you are using a craft knife, apply gentle pressure and make multiple passes rather than attempting to cut through the card stock in a single motion. This technique reduces the risk of slipping and damaging the template. Once all pieces are cut, turn your attention to scoring the fold lines. Scoring involves lightly pressing a blunt tool along the dotted or dashed lines to weaken the fibres of the paper, making it easier to fold cleanly. A scoring tool, bone folder, or even a spent pen can be used for this purpose. Place your ruler along the fold line and run your tool gently but firmly along its edge. Avoid pressing too hard, as this can tear the paper. Proper scoring is one of the secrets to achieving the crisp angles that define the geometric art of low poly papercraft. After scoring, gently fold each line to test the crease, ensuring that the paper bends smoothly without buckling or tearing.
Folding and Gluing Methods to Bring Your Papercraft to Life
With all pieces cut and scored, you can now begin the assembly process. Start by folding each piece along the scored lines, taking care to match the fold direction indicated on the template. Mountain folds should point away from you, while valley folds should pull toward you. Work methodically through each section, and do not rush to glue anything until you are confident that the folds are accurate. Once a piece is folded, apply a small amount of adhesive to the tabs marked on the template. Use a thin, even layer to avoid excess glue seeping out and creating unsightly stains on your polar bear sculpture. Press the corresponding edges together firmly, holding them in place for a few seconds to allow the adhesive to bond. Some crafters prefer to use tweezers or a small brush to apply glue to tight spaces, which can help maintain precision. As you join the pieces, the three-dimensional form of your Arctic animal will begin to take shape. It is often helpful to assemble the model in sections, such as completing the head, body, and limbs separately before joining them together. This approach makes handling easier and reduces the risk of accidentally damaging previously glued areas. Throughout the assembly, refer back to the instruction sheet and the numbered tabs to ensure that each piece is connected in the correct order. If a section does not fit as expected, double-check your folds and alignment before applying more glue.
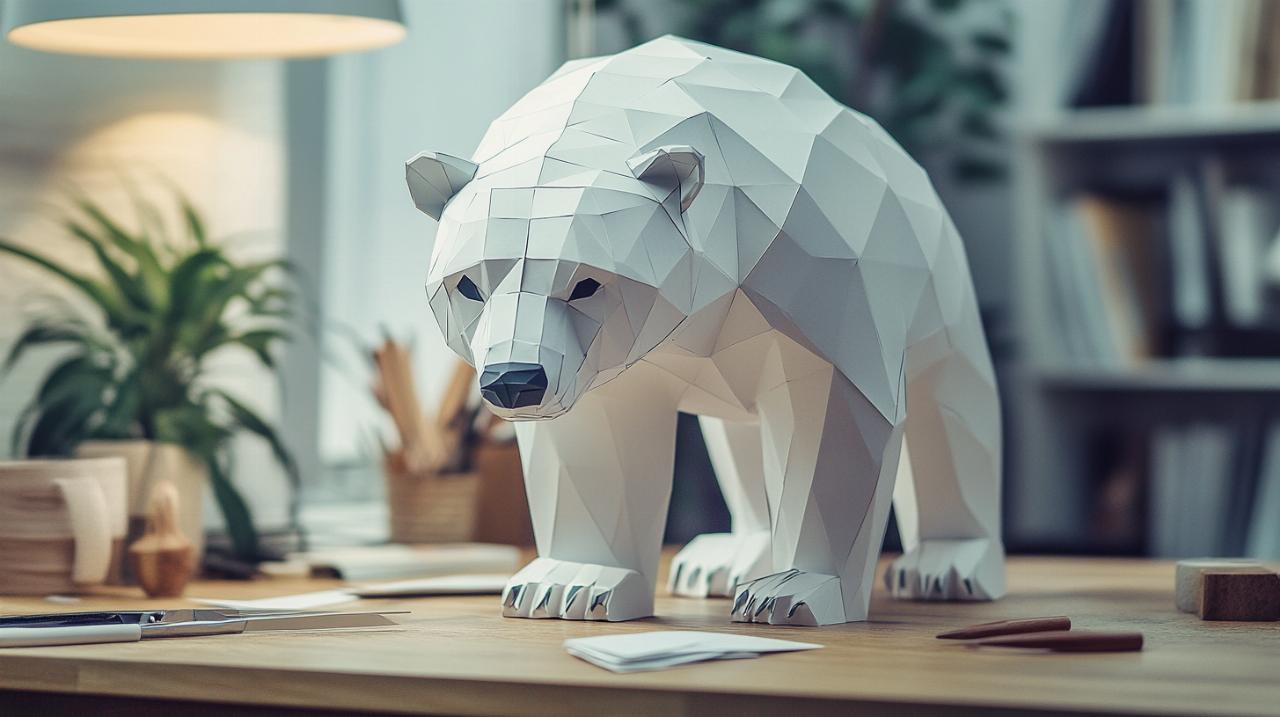
Finishing Touches and Display Ideas for Your 3D Origami Polar Bear
Once your polar bear is fully assembled, you may wish to add personal touches and consider how best to display your handmade creation. These final steps transform a well-executed craft project into a unique piece of wall art or home decor that reflects your individual style.
Adding details and personalising your papercraft creation
While the low poly design of your polar bear is striking in its simplicity, there are several ways to enhance its appearance and make it truly your own. Some enthusiasts choose to reinforce the internal structure by adding small strips of card stock or mounting board to the inside of larger sections, providing additional stability and preventing sagging over time. This technique is particularly useful if you plan to display the model in a prominent location where it may be handled frequently. You might also consider adding a coat of sealant or clear varnish to the exterior, which can protect the paper from dust and moisture while giving the surface a subtle sheen. If you prefer a more playful approach, you can use coloured markers, paints, or washi tape to accent certain features, such as the eyes, nose, or claws. This personalisation allows you to adapt the template to suit your aesthetic preferences and can be a fun way to involve younger members of the household in the crafting process. Another option is to experiment with different types of paper, such as textured or metallic card stock, which can lend a distinctive character to your animal sculpture. The versatility of this DIY kit means that no two polar bears need look the same, and each iteration can reflect the creativity and skill of its maker.
Creative ways to showcase your completed polar bear model
Once your polar bear is complete, the question of display becomes paramount. This striking piece of geometric art deserves a place where it can be admired and appreciated. One popular option is to mount the model on a wooden base or shadow box, which provides a stable platform and adds a professional finish. You can secure the polar bear to the base using strong adhesive or small pins, ensuring that it remains upright and level. Shadow boxes are particularly effective for creating a sense of depth, and you can enhance the presentation by adding a backdrop of Arctic-inspired colours or images. Alternatively, your polar bear can serve as a captivating element of wall art. By attaching a small wire loop or mounting bracket to the back, you can hang the sculpture directly on the wall, where it will cast intriguing shadows and add a three-dimensional element to your decor. Some crafters prefer to group multiple paper models together, creating a gallery of animal sculptures that showcases a range of origami style designs. This approach is especially effective in children's rooms, creative studios, or any space that benefits from a touch of whimsy and handmade charm. If you are part of a crafting community or sell your work on platforms such as Etsy UK, photographing your completed polar bear in a well-lit setting can help you share your achievement and inspire others to undertake their own projects. The combination of a printable template, accessible crafting supplies, and a bit of patience results in a piece that is both a testament to your skill and a delightful addition to any home. Whether you choose to keep your creation as a personal memento or gift it to a friend, this polar bear papercraft is sure to bring joy and admiration wherever it is displayed.